How to apply
Sunday Salon DIY Lashes
Get salon quality lashes without leaving the comfort of your home with Sunday Salon's DIY Lash system. Experience a hand-curated collection of lashes, carefully selected by expert lash technicians, ensuring that every style you choose from the Sunday Salon range is simply the finest.
DIY Lashes Application Instructions
Step 1: Prep
Prep your natural lashes by removing any makeup or excess oils to maximise wear time. Use a cotton pad to clean eye area before application.
Always conduct a patch test before using our products.
Pro Tip: Curl your natural lashes before applying the bond using a lash curler.
Step 2: Apply Bond
Brush on a thin, even coat of Bond under your natural lashes, brush from the base of your lashes to the mid-way point and use very sparingly – a little goes a long way. Brush only in one direction so that the lashes don’t stick to each other.
Apply your clusters in sections - apply bond to the first section of your lashes, then apply the first cluster. Move onto the next section, apply bond, then the cluster. Repeat until you have applied the full set. This will help avoid potential stickiness that can occur when applying bond to all your lashes at once.
For thinner lashes, apply 2 coats. For thick lashes, apply 1 coat. Then wait 20-30 seconds for the Bond to become tacky on your lashes.
Optional Application Method:
You can also apply your bond directly to the cluster lash, rather than your own lashes. Some customers prefer this application method.
Step 3: Apply Lashes
Using the lash applicator, gently apply each cluster underneath the base of your natural lashes, 1mm away from the waterline to avoid possible irritation.
Pro Tip: Wipe your lash applicator between clusters to remove any sticky residue
Step 4: Clamp & Set
Once you’re satisfied with your application, you can use the lash applicator to clamp down on your natural lashes and the lash clusters. This will help the adhesive set.
Step 5: Seal
To remove any residue and give your lashes an extra long lasting hold, apply a thin coat of the seal above and below the lashes.
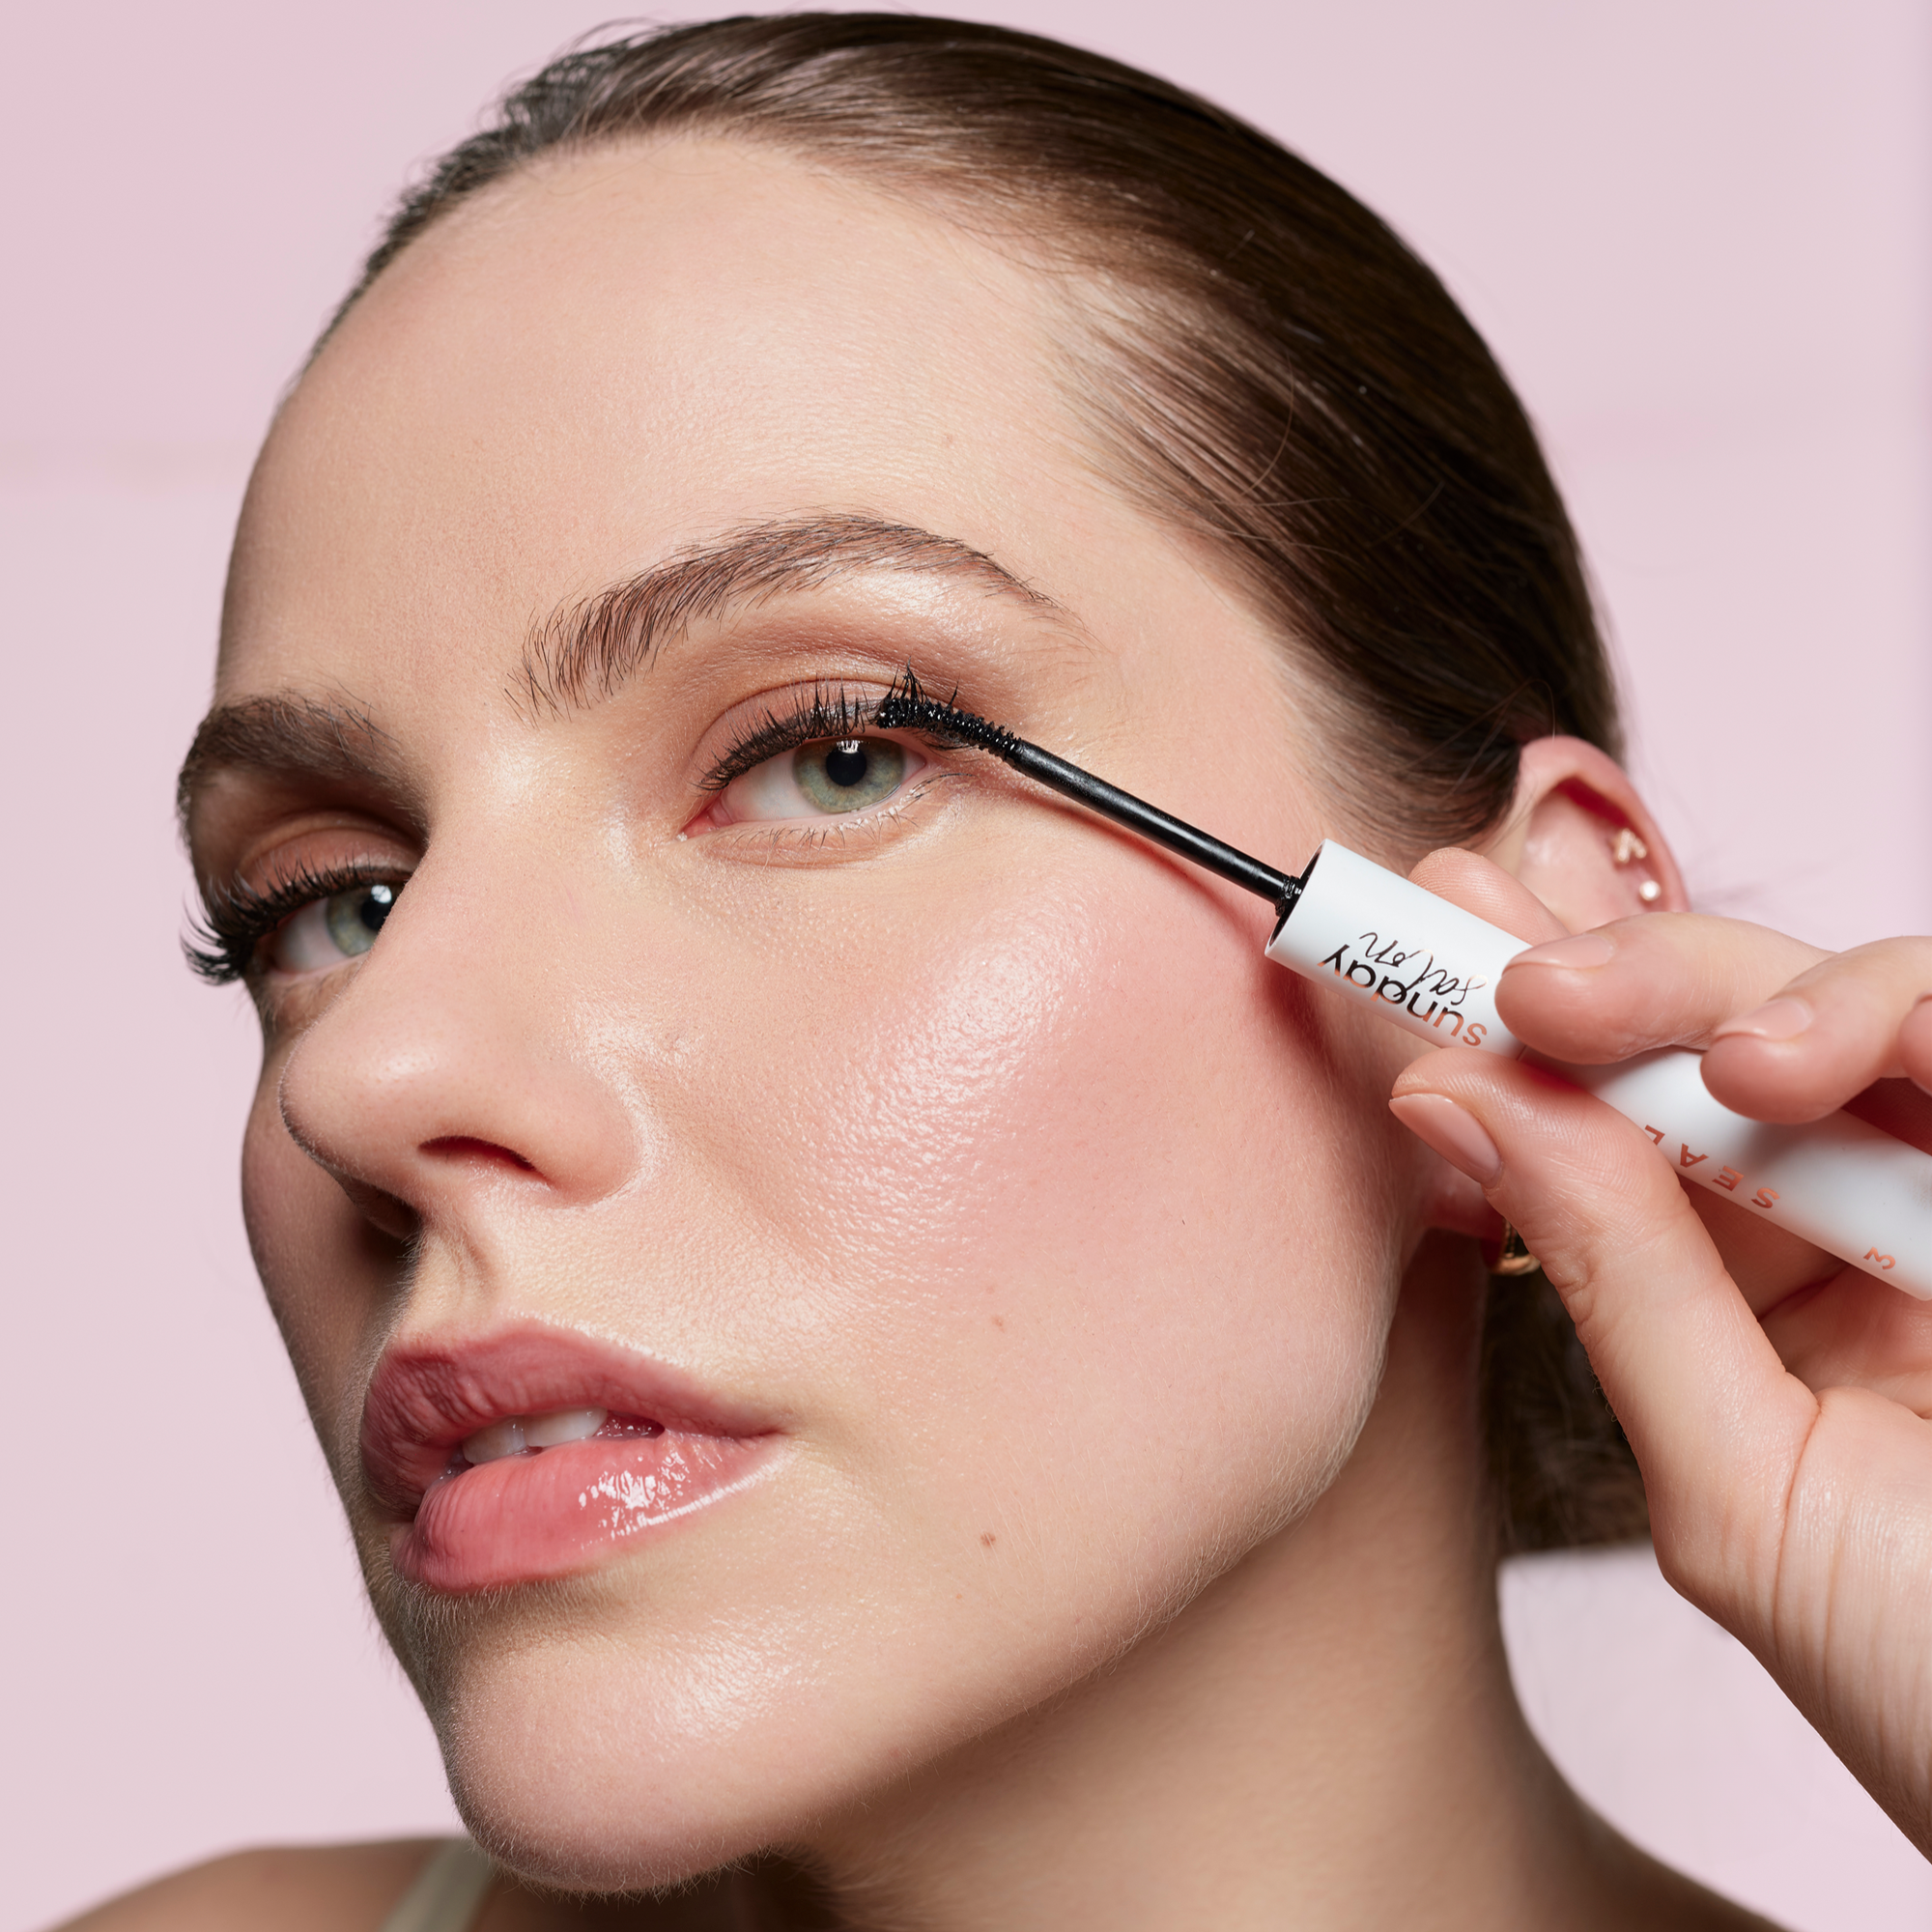
Bond
Brush on a thin coat of Bond under your natural lashes – a little goes a long way. Then wait 20-30 seconds for the Bond to become tacky on your lashes.
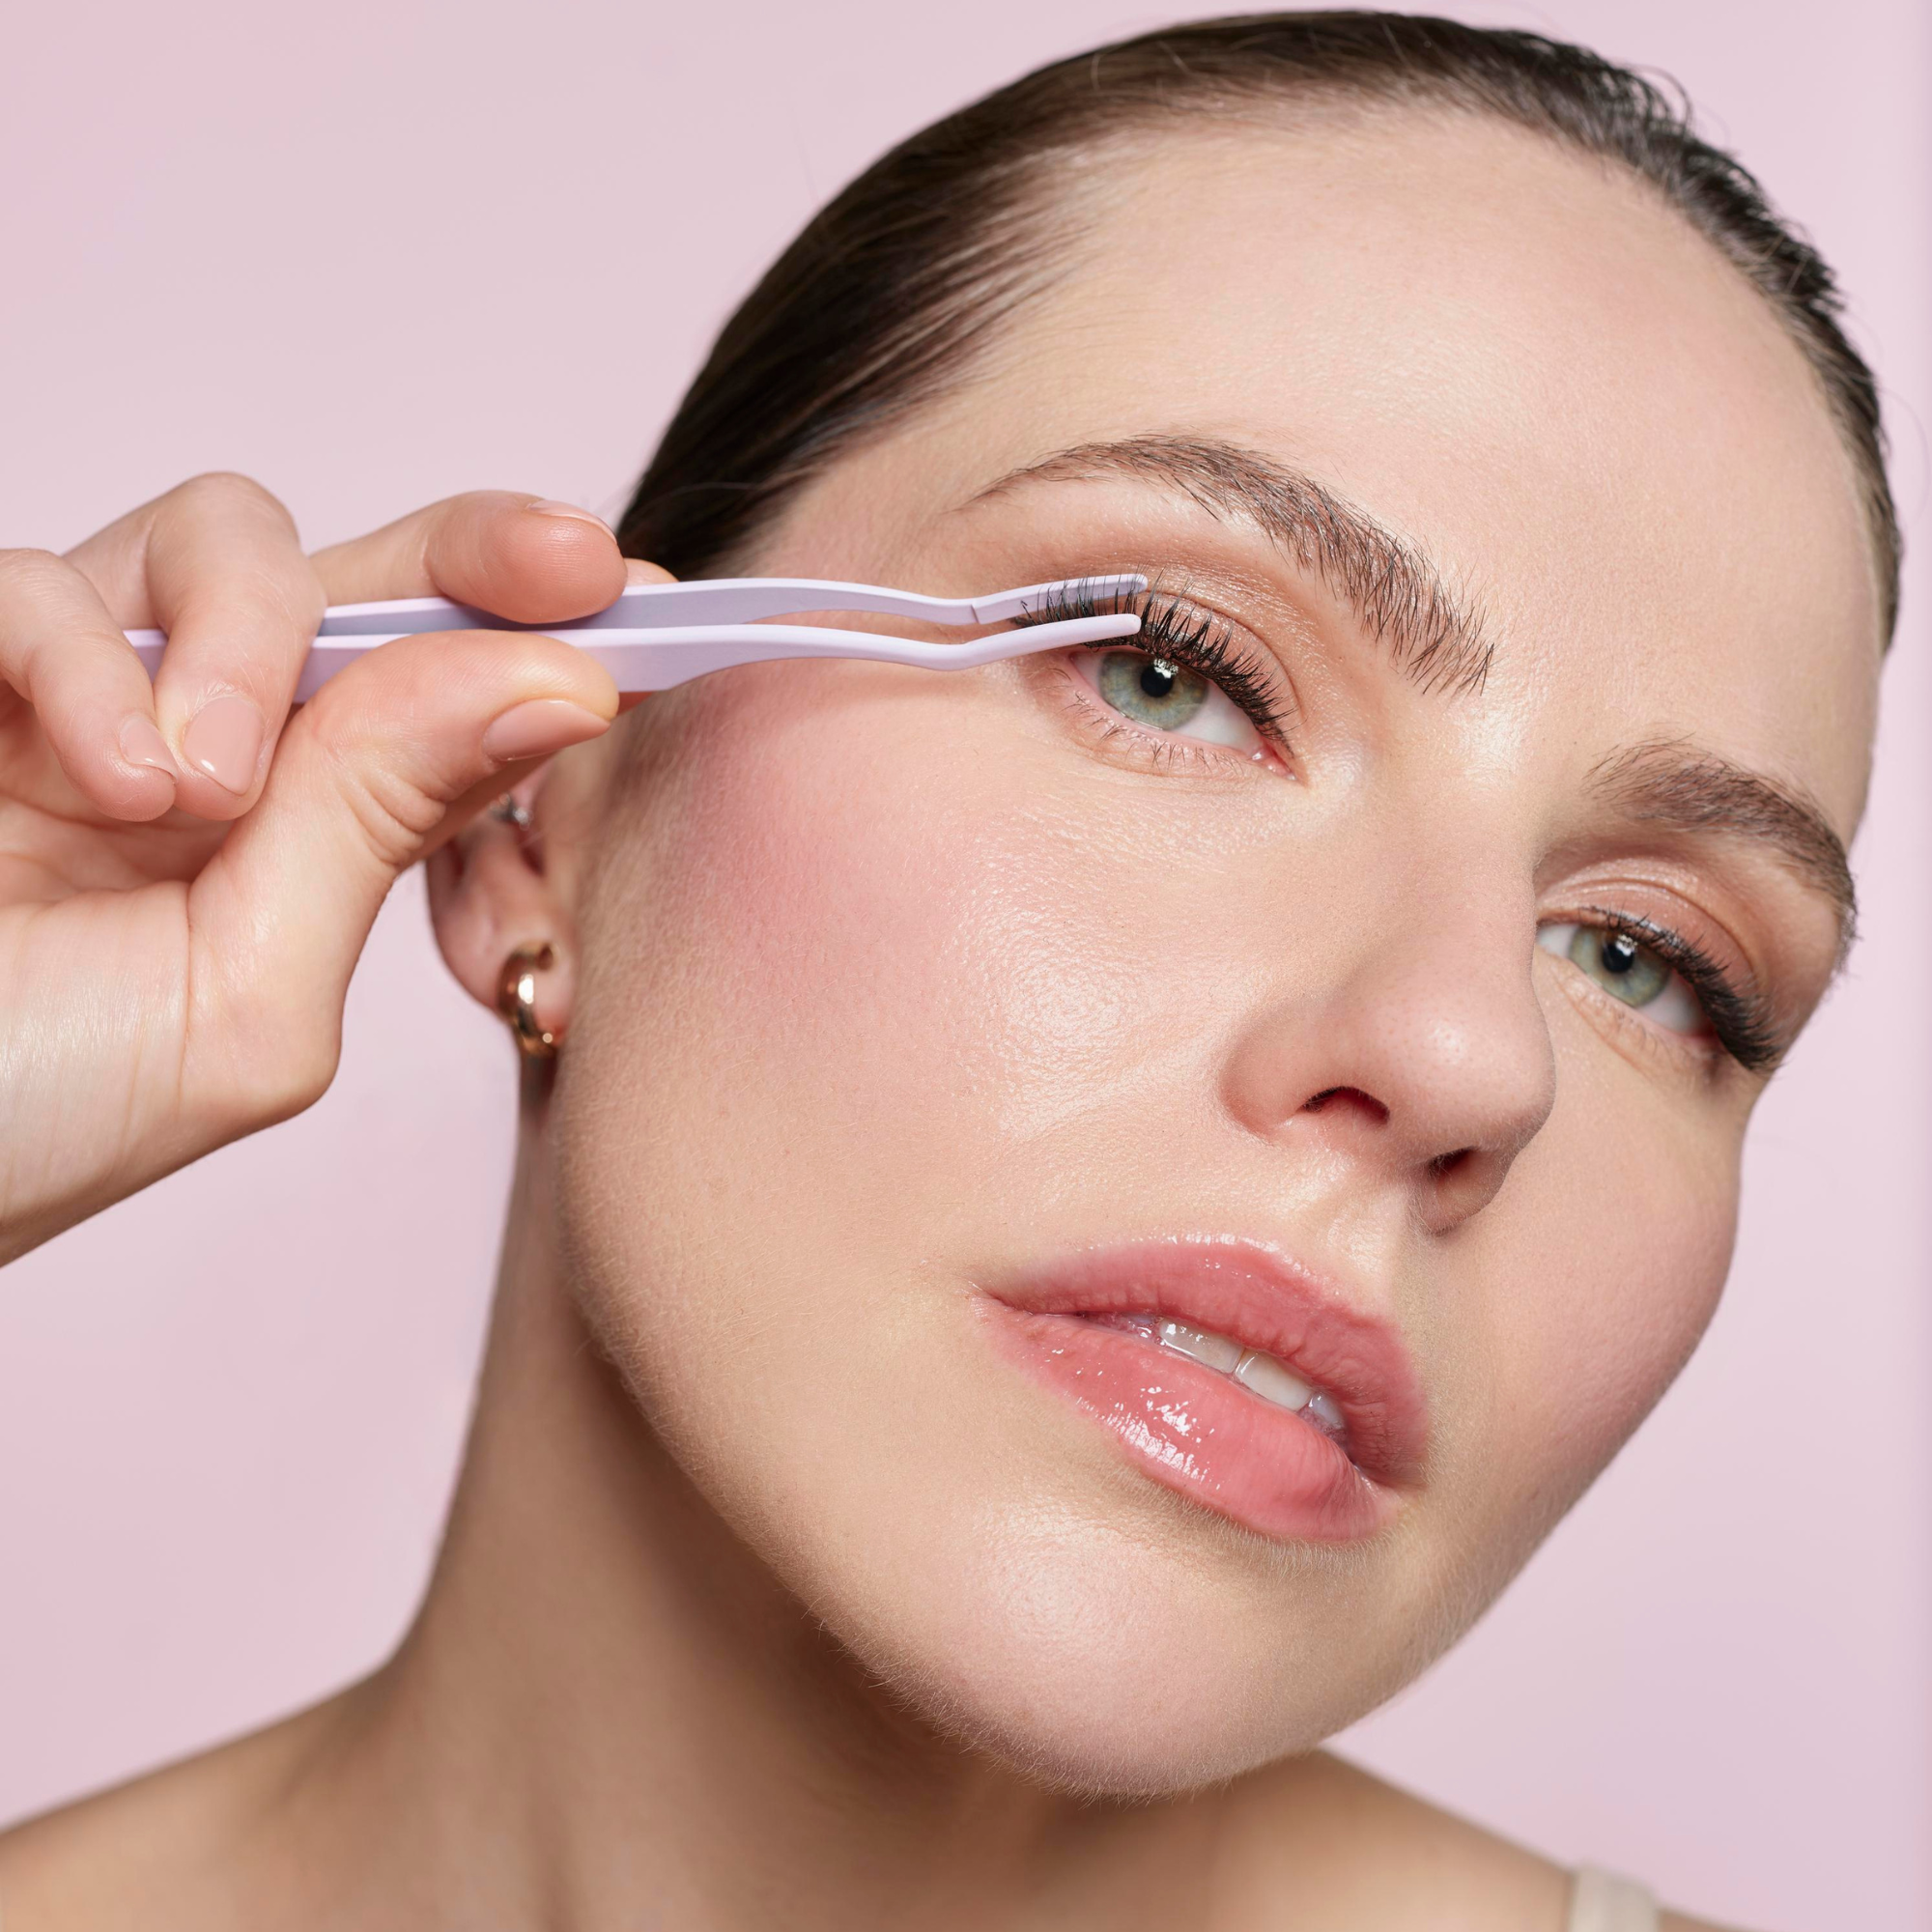
Apply Lashes
Using the lash applicator, gently apply each cluster underneath the base of your natural lashes, 1mm away from the waterline.
Use the lash applicator to clamp down on your natural lashes and the lash clusters. This will help the adhesive set.
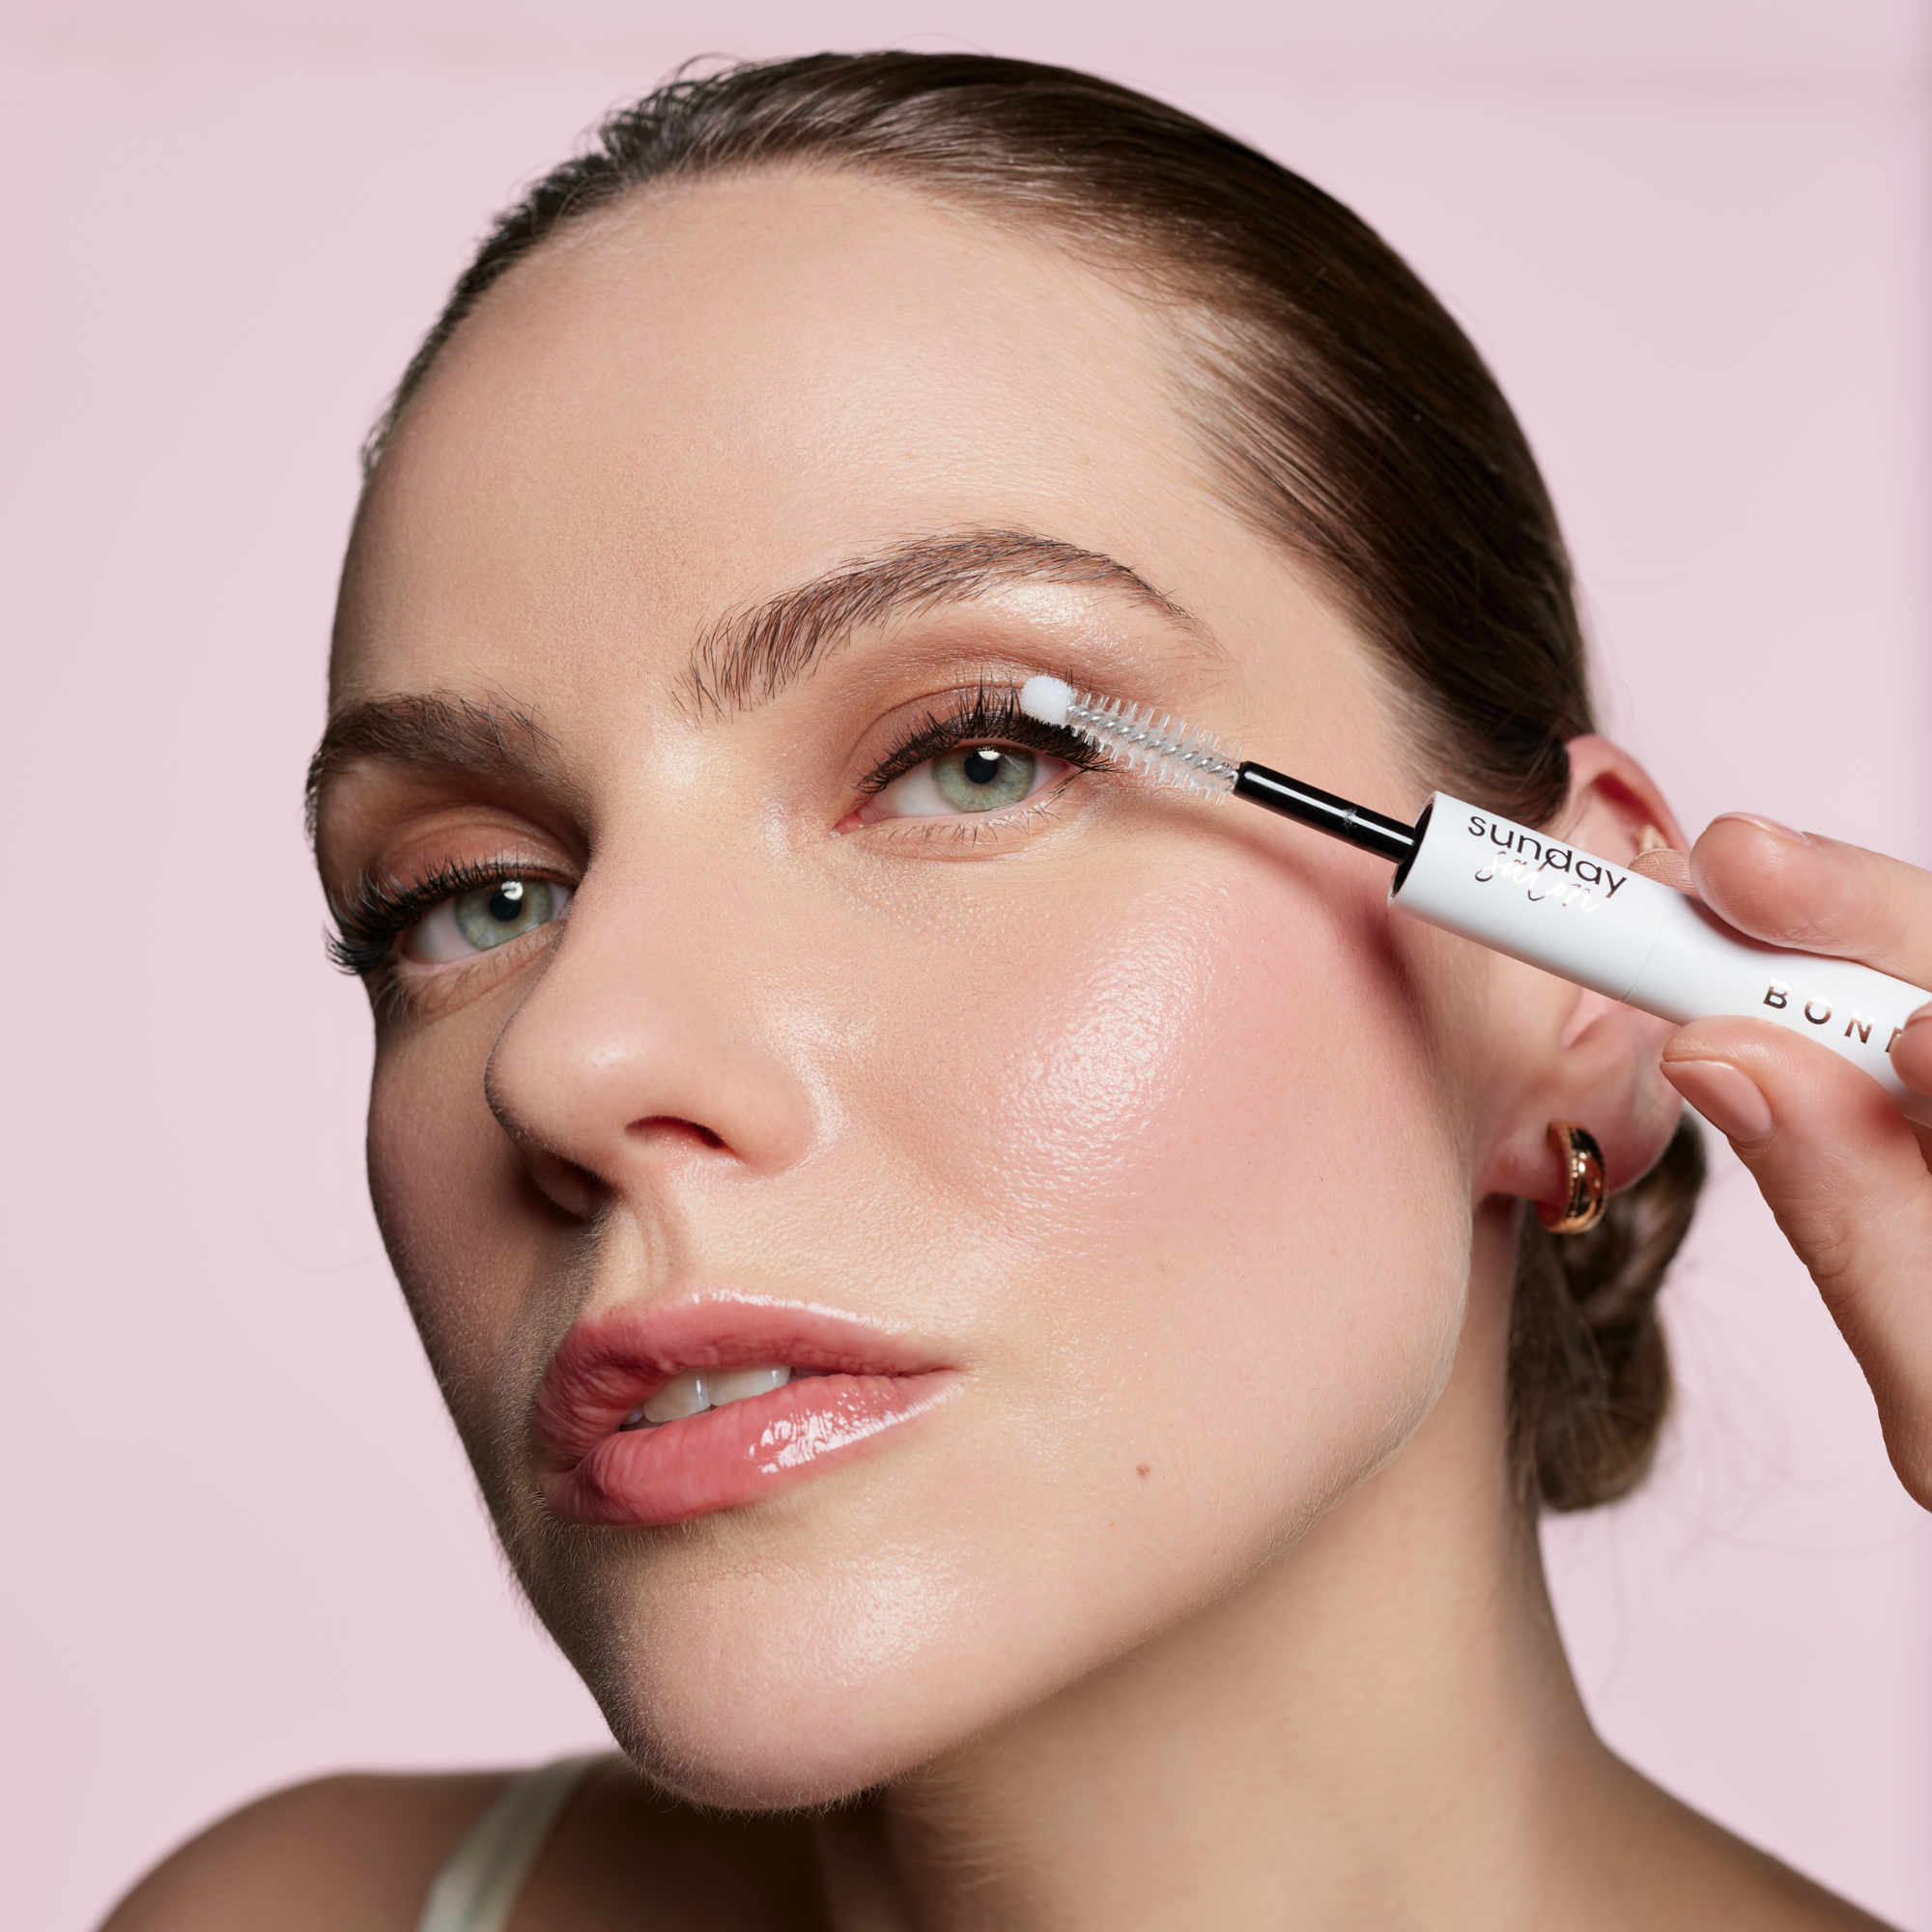
Seal
To remove any residue and give your lashes an extra long lasting hold, apply a thin coat of the seal above and below the lashes.
Application Tips
- For extra adhesive strength, apply bond to the upper side of each cluster before placement.
- Leave a few natural lashes free on the outer corner while applying the first cluster for a more natural look. Ensure there are no gaps between lash segments as you work towards the inner corner.
- Before applying bond to natural lashes, detach the lash clusters from the tray for smoother application.
- To extend lash extension longevity, add a thin layer of bond to the lash cluster's band before application. Allow it to dry for 20-30 seconds before attaching the clusters to natural lashes.
- When applying the Seal, use the fuzzy ball tip at the lash base where the Bond is stickiest. Apply the Seal from the root to the tip using the brush applicator.
- After applying lashes, wait 24 hours before showering or exposing them to steam. During showers or face washing, avoid direct water contact with the eyes.
- Use cotton pads to clean the eye area around the lashes before use. This prevents oils from touching the lashes, which can weaken the bond and reduce wear time.
- Avoid sleeping on your face to maintain lash extension longevity.
- If lash clusters loosen after days of wear, apply a thin coat of Bond to the band and merge it with the natural lash using the lash applicator. This prolongs cluster wear.
- Do not peel off lash clusters from natural lashes; use Sunday Salon's Remover for effective removal.
Removal
When you remove your DIY Lashes correctly, it's a damage-free process. Don't worry if you see a few of your natural lashes coming off with the segments during removal. Natural lashes naturally shed daily, so you haven't pulled them out prematurely; it's just a part of their natural cycle.
Removal Process:
- Gently apply our remover to both the top and bottom of your DIY Lashes generously. Wait for 20 to 30 seconds, then either brush through or use a cotton pad to wipe them away. Repeat if necessary.
- After removing your DIY Lashes, you may have bond residue on your natural lashes. Repeat the above steps on your natural lashes until they are free from bond residue.
- Before applying a new set of DIY Lashes, ensure your lashes and eye area are free from remover residue. If any remover residue remains on your natural lashes, it may hinder the successful application of a new set.
Missing the remover?
Another effective method we suggest involves using an oil-based makeup remover, which functions similarly to what's used with traditional lash extensions. Simply use a clean mascara wand to brush through your lashes, allowing the oil-based remover to break down the adhesive. Alternatively, you can gently dab the lashes with a cotton pad. For added effectiveness, consider mixing a bit of baby oil with your remover to aid in breaking down the glue.
Need help?
Frequently Asked Questions
Enjoy long-lasting lashes in just minutes with our easy-to-use lash extension kit, perfect for beginners. Designed to emulate salon lash extensions, Sunday Salon allows you to skip the salon and save time without sacrificing quality. Sunday Salon DIY Lash Extension kits include everything to amplify your lashes swiftly, using fewer clusters for a look that rivals professional treatments. Simply apply the bond, set the clusters in place, and enjoy a seamless finish – beauty made simple!
While wearing DIY lash extensions, you can certainly keep your face/eye area clean and shower with them on. When cleansing around the eyes, gently navigate with a cotton swab to reach any tricky spots. If there's makeup on the lashes, carefully dab it off with a water-dampened cotton swab. It's important to steer clear of oil-based products near the eyes, as oils can weaken the adhesive bond. On the day you plan to remove your lashes, ensure to thoroughly cleanse your natural lashes for optimal lash health.
Absolutely not. If you find that you're aware of the Cluster Lashes while wearing them, it's a sign that they haven't been placed accurately. In such instances, it's best to take them off and reapply for a more comfortable, seamless fit.
We offer a no questions asked 14-day Money Back Guarantee on used and unused products. Try our lashes risk free with easy returns.
We offer exchanges up to 30 days after receiving your order. If you aren't 100% happy with your purchase, we'll happily exchange it for another product on our website.
To submit a return or exchange request, please reach out with your order number to our customer support team at support@lolascosmetics.com
Struggling with your DIY lashes?
Please reach out to our customer service team by visiting the contact us page